Contact Us
Victoria Road Practice
34 Victoria Road
Hartlepool, TS26 8DD
01429 861327
Owton Manor Practice
212 Owton Manor Lane
Hartlepool, TS25 3QD
01429 265471
Northgate Practice
29 Northgate
Hartlepool, TS24 OJT
01429 222707

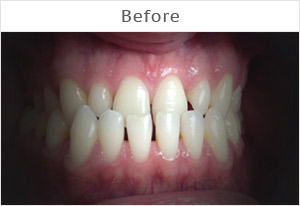
[before-after width="95%" is_wiggle="true" overlay_color="#1ba5e2"]
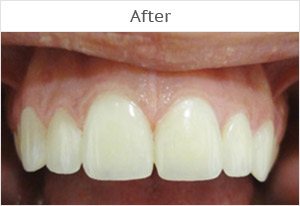 [/before-after]
[before-after width="95%" is_wiggle="true" overlay_color="#1ba5e2"]
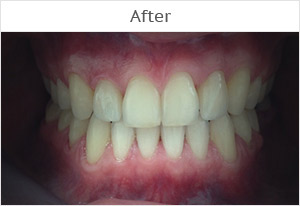 [/before-after]